How to Plan a Bedroom Gallery Wall in a Small Room
A paper-template method for planning a gallery wall in a small bedroom: set the outline, limit the frame finishes, test the layout on the floor and the wall, then hang from the center out.

At a glance
What you need
- Five to nine frames in two finishes at most
- Kraft paper or newspaper
- Painter's tape
- A tape measure, pencil and scissors
- A small level
- Hanging hardware rated for each frame
Two fears stop most people from starting a bedroom gallery wall: that the result will look cluttered in a room already short on calm, and that getting there will leave a trail of holes in the wrong places. Both have the same cure. Decide everything on the floor and on paper, and touch the wall only once the arrangement is settled.
The method below takes an afternoon and uses nothing more specialized than kraft paper and painter’s tape. In a small room it matters more than usual, because a gallery wall is the busiest thing you can put on a wall and it needs firm limits to stay tidy.
Choose the wall and the outer shape first
Pick a wall you look at from a distance, such as the one above a dresser or the one facing the door, not a wall you squeeze past. A gallery needs a step or two of viewing distance to read as one composition.
Then set the outline before choosing a single frame. Above a 36 in (91 cm) dresser, a rectangle about 30 in wide and 36 in tall (76 x 91 cm) is plenty. Mark its corners on the wall with small pieces of painter’s tape. Everything stays inside that boundary, and that boundary is what keeps a gallery from spreading until it takes over the room.
The wall behind the bed has its own sizing and safety rules, so read the advice on what to hang over the headboard before planning a gallery there.
Grid or organic: pick one
| Layout | What it needs | Effect in a small room |
|---|---|---|
| Grid | Identical frames, identical gaps, 4 to 9 pieces | Reads as one large panel; the calmer choice |
| Organic | Mixed sizes, one consistent gap, 5 to 9 pieces | Looser and more personal; needs a strict outline |
If the room already has patterned bedding or open shelves, choose the grid.
Gather frames and one color thread
Use two frame finishes at most, for example black and natural wood. A third finish is where a small gallery starts to look like a collection of leftovers. For an organic layout, collect one large frame around 16 x 20 in (41 x 51 cm), two or three medium ones and a few small ones about 5 x 7 in (13 x 18 cm).
Then find a color thread: one color that appears in at least half the pieces, ideally taken from the bedding or the rug. A soft green repeated in three botanical prints links them to a green throw across the room, and the wall stops looking like a separate project.
Before you begin, gather:
- Your frames, with the art already in them
- Kraft paper or newspaper, scissors and a pencil
- Painter’s tape, a tape measure and a small level
- Hanging hardware rated for each frame and suited to your wall type
Plan it on paper, step by step
- Mark the outline on the floor. Tape a rectangle on the floor the same size as the one on the wall.
- Lay out the frames. Put the largest frame slightly off-center, then build around it. Balance visual weight: a dark or large piece on the left needs something of similar presence on the right.
- Set the gaps. Keep one consistent gap of roughly 2 to 3 in (5 to 8 cm) between all frames. Use the narrower end for small frames. Even spacing is what makes mixed sizes look planned.
- Take a reference picture with your phone from directly above so you can rebuild the layout later.
- Trace each frame. Draw around every frame on paper and cut out the shape. On each one, write which frame it is and mark where its hanger sits by measuring down from the top edge of the frame.
- Tape the paper shapes to the wall inside your marked outline, copying the floor layout. Use the level on the larger shapes.
- Live with it. Step back to the doorway, then look from the bed. Shift the shapes until the gaps are even and the outline is clean. Leave them up overnight if you can.
- Hang from the center out. Start with the central or largest frame, fixing through the marked spot on its paper, then tear the paper away. Work outward so small errors never add up across the wall.
Safety note
Hang each frame with hardware rated for it and suited to your wall type, and follow the manufacturer instructions. If you are unsure what is behind the wall, such as pipes or cables, ask a professional. Anything that ends up above the bed should be lightweight and securely fixed, with no glass over the pillows.
How to judge the result
Stand in the doorway and half-close your eyes. You should see one shape with a clear edge, not scattered dots. Then check three details:
- The gaps look equal everywhere; one wide gap reads as a missing frame.
- The center of the whole group sits near eye level, or the bottom row is about 6 to 10 in (15 to 25 cm) above the furniture.
- No single frame draws the eye to an outer corner. If one does, swap it toward the middle.
The low-commitment version: a picture ledge
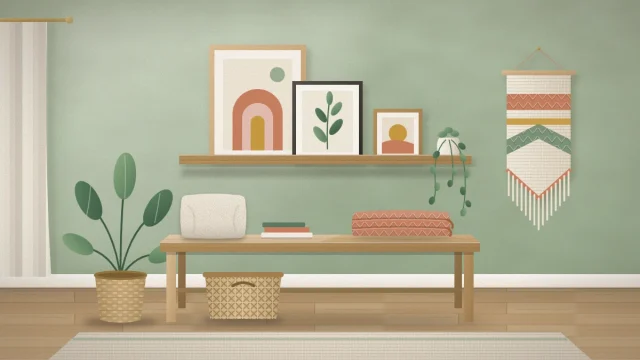
If you change your mind often, put the gallery on a picture ledge. One ledge about 3 to 4 in (8 to 10 cm) deep carries five or six leaning frames in overlapping layers, tallest at the back, and you rearrange them without marking the wall again.
Renters have more choices still, including leaning a few large frames on a dresser. Removable adhesive strips are another route for light frames: check your lease, test one on a hidden spot first and stay within what the product states. The guide to renter-friendly bedroom decor covers these in detail.
Adapting the plan to a different room
In a very narrow room, turn the outline into a tall column about 20 in (51 cm) wide beside the closet or window; a vertical group draws the eye upward and uses wall that furniture cannot. In a larger room, widen the outline to about two thirds of the furniture below instead of adding more small frames.
Tip
Keep the paper templates. If you add a frame later, tape its shape up first and check that the outline still holds.
If a gallery turns out to be more than the room wants, a single large piece or a textile may suit it better; compare the options among these wall decor ideas for small bedrooms.
Frequently asked questions
How far apart should frames be on a gallery wall?
A consistent gap of roughly two to three inches works for most small rooms, with the narrower end suiting small frames. The exact number matters less than keeping it the same everywhere, because even spacing is what makes frames of different sizes read as one planned arrangement.
How many frames does a small bedroom gallery wall need?
Five to nine is a comfortable range. Fewer than five tends to look like a few separate pictures, and more than nine can overwhelm a compact wall. Decide the outer shape first, then use as many frames as fit inside it with even gaps, instead of starting from a number.
Can a gallery wall make a small bedroom look cluttered?
It can if it has no limits. A marked outline, two frame finishes at most, one repeated color and equal gaps keep it reading as a single shape. It also helps to leave the other walls plain so the gallery is the only busy surface in the room.